Big This Week

Recent Posts

Tuesday, 31 October 2017

This is Halloween

Yayy! It's officially my favourite day of the year! And so, I thought that I'd share a post with you all in celebration of this wonderful occassion. I usually go to a Halloween party either on the day or the weekend before, however this year I stayed at home which to be honest, suits little introverted me just fine. Being able to dance around the house listening to my Halloween playlist in my comfy PJ's, all toasty warm and not having to deal with the anxiety of having to go out has been perfect! I've had a lot of fun creating another spooky makeup look and pumpkin carving and watching a scary movie (there will be quite a few more watched before it's bedtime too!). This post will just be one of the rambling kinds, but I hope you all enjoy reading nonetheless :) 

This is Halloween | Halloween Blog

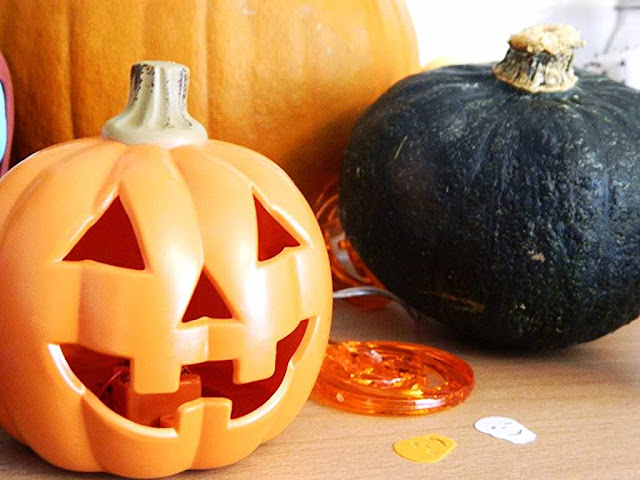
The first Halloweeny activity that I did today was to finish putting up my decorations. I had planned on getting my bedroom decorated earlier in the month, however lots of things in life like to get in the way of my productivity and motivation, so I ended finally doing that today. I am going to be leaving my spooky decor up until it's Christmas time so it's gonna be on display for at least a month, if not a little longer. When I set up my decorations in my bedroom, I usually create a combination of a Halloween display and a traditional pagan Samhain alter. Samhain is basically the original Halloween, the festival marking the coming of the darker, cold months and the end of the harvest. However, this year my decor is mostly Halloween-based since almost all of my stones and willow wand are stored away ready for starting the decorating of my new bedroom. So, anyhow here are some lots of photographs of my Halloween display!

This is Halloween | Halloween Blog


This is Halloween | Halloween Blog


This is Halloween | Halloween Blog

This is Halloween | Halloween Blog

This is Halloween | Halloween Blog

This is Halloween | Halloween Blog

This is Halloween | Halloween Blog


This is Halloween | Halloween Blog

This is Halloween | Halloween Blog

On top of my chest of drawers, I have added LOTS of spoopy decorative pieces, including quite a few things from Wilkos: the bat garland that I've attached to my wall underneath my art print display, an array of different halloween tinsels, and some spooky character sequins/confetti. I have collected most of the other decorations, such as the little jack-o-lantern lights, the skull mason jar (a gift from my dad), the pumpkin 'fairy' lights and the frosted glass jar that has a face reminiscent of Jack Skellington's (a gift from my mom), over the last month or so from either local Poundshops or my hometown's Quality Save store (a store owned by the same company as B&M). 

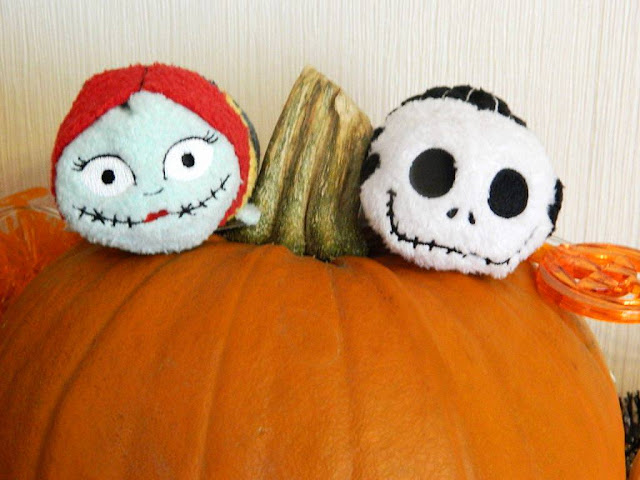
For the rest of the decor, I used various horror and halloweeny themed collectable vinyl figures from my ever-growing collection. Oh, and my Jack & Sally tsum tsums from the Disney store, both displayed sitting on top of a pumpkin and nearby an ugly green seasonal squash, both from Lidl. The adorable Halloween hello kitty plushie was a birthday present I got a few years ago from my best friend The Wednesday Addams art print is from a previous Spooky Box Club subscription, which you can read all about here if you're interested :) So, what do you guys think of my halloween display?


This is Halloween | Halloween Blog


This is Halloween | Halloween Blog

Before I show you guys my Halloween look, here is the Jack-O-Lantern face that I carved this evening. It's supposed to be a Cheshire Cat, but his mouth didn't quite go to plan. Can you tell what he's supposed to be though? Probably not, hahaha! I think he's very cute either way. Next to him, you can see my sister's very skillful work on her pumpkin. Can you believe this is the first one she's ever carved as well? She's super good at art unlike me but I think that's clear to see *insert embarrassed monkey emoji here*. My pumpkin looks great though with a tealight inside, on top of my drawers amongst my other Halloween decorations all lit up! I find  the soft orange flow very relaxing too so it will be nice to have them turned on whilst I'm laying in bed at night. Did you carve a pumpkin this year? If so, what pattern did you choose to carve? Carving a pumpkin is definitely one of my favourite things to do this time of year. I love the smell of fresh pumpkin too, not so much the taste though!

So finally, here's is my makeup look of the day! If you follow me on social media, you'll may have already seen it, but if not, ta-da!

This is Halloween | Halloween Blog

 I am now a vampire! It's official. I have red eyes and pearly-white fangs and everything! ;) I actually did a vampire look last year for Blogtober, but I wanted to up my game this year and try something that I've been wanting to for years and years... contact lenses! LOOK AT MY EYES GUYS (I love random ryhmes)!! One of the only things that was really holding me back from experimenting with contact lenses was my fear of damaging my eyes. You hear all these horror stories about people stratching the surface of their eyes or having a lens get lost somewhere which means a trip of the hospital. However, I decided to brave my nerves as I have lots of friends who wear fashion lenses and they've never had a problem, plus they look so flippin' cool! 

After watching a massive amount of contact lens related videos over on Youtube, I came to the conclusion that it wasn't as bad as I thought it would be; all the youtubers made it look easy and so I decided to buy some red contacts from the Terror Eyes range at Wildcat, because I'd heard it was a good brand. I was very happy with how bright they were! The fangs are from the same brand that I used for my previous vampire look, 'small sexy fangs' by Scarecrow. I wrote a review all about them last year, I love them! 

As for the makeup that I used:

- My usual base makeup, Rimmel London Wake Me Up Foundation & Concealer (in Ivory)
- My new Makeup Revolution Ghost Powder, applied on top of my base
- Another new Makeup Revolution product, Ghost Highlight (this was actually the first highlight I've ever used!)
- For my eyes: white eyeshadow from my Makeup Revolution Redemption Eyeshadow 'Acid Brights' palette, Rimmel London black kohl pencil liner, Collection Extreme 24hr felt tip liner and Rimmel London Volume Flash mascara
- From my lips: Maybelline Color Sensational Mattes 'Divine Wine' Lipstick, and a tube of fake blood (applied using a cotton bud). 

Other than the vampire-esque accessories that I bought, I decided to keep the makeup look very simple. Partly because I didn't want to add too much eye makeup that might irritate my eyes since this was my first time wearing the lenses, and also because I wanted the attention to be on my red eyes and the blood effect around my mouth. I am really really happy with how my completed vampire makeup looked! I actually felt good about myself, confident and in the mood to take selfies, which doesn't happen very often :) Let me know what you all think in the comments. 


Now that my post is all done, it's time to go watch some horror movies. I'm thinking a classic one from the 80's, when most of my favourite horrors were released or maybe a Rob Zombie one because I absolutely adore his work! Horror fans, what's your favourite movie? If you don't like horrors, I'd still love to hear what your favourite non-scary movie to watch at Halloween time. Next time I blog it will be November... how is the year going by this quickly!! I hope you all had a lovely day, whether you celebrate Halloween or not :)

Thankyou for reading!

 ♥

How did you spend this Halloween? 

I'd love if you could follow me over on my social media! 
| Instagram | Facebook | Twitter | Tumblr | Pinterest | Google + | Bloglovin' |
Share:

Monday, 30 October 2017

Halloween Look #5

Hey everyone! Another Halloween, Another Spooky Look :) At the moment, I'm pretty obsessed with the new version of Stephen King's IT, with the gorgeous Bill Skarsgard playing Pennywise the Clown. I've watched it three times now, and I'd happily watch it again and again! They've done such a great job with this movie; have you watched it yet? If not, you seriously need to! Because of my current obsession, I have been really wanting to create my own Creepy Clown look, and if you follow me over on Pinterest you may have noticed my regular pinning of inspiration for this. Today, I had a lot of fun creating my look and so I thought I'd share it with you all. 

Halloween Look: Clown

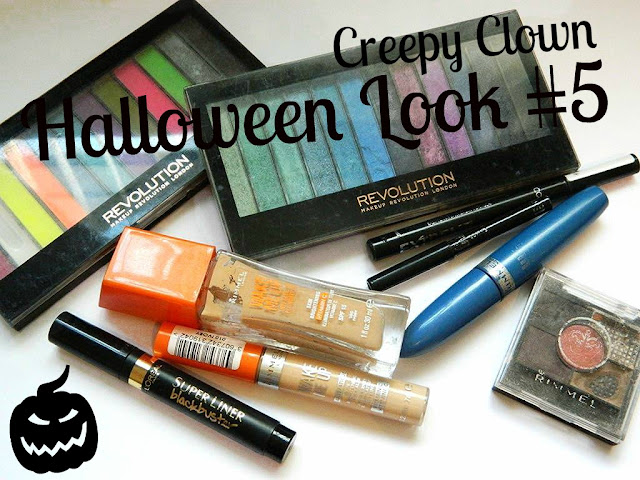
If you're a new reader of my blog, you may be wondering why today's post is titled as number 5... last year I took part in Blogtober, where bloggers challenge themselves to share a post everyday of October. During this time, I shared four different Halloween make up looks: a Vampire, Wednesday Addams, a Zombie and my version of Regan from the Exorcist. I was determined to create at least one new costume look this year, and I'm really glad that I managed to. So, what products did I use?

Halloween Look: Clown

Today was my first time playing around with liquid latex, and it was definitely interesting. It was my intention to create a SFX (Special Effects) make up look, but silly me forgot to get some scar wax! I tried following a tutorial recipe to make some wax-like material myself using flour and vaseline, but it just didn't want to stay stuck to my face! But nevermind, I used my new Makeup Revolution SFX face paint palette, and some other cosmetics and things to make a look I was happy with :) 

Products that I used to create my Creepy Clown look

- Makeup Revolution 'Mermaids VS Unicorns' Redemption Eyeshadow Palette  
- Makeup Revolution 'Acid Brights' Redemption Eyeshadow Palette
- Makeup Revolution Ghost Powder
- Makeup Revolution Spectre SFX Palette Face Paint
- Makeup Revolution Liquid Latex
- Rimmel London Wake Me Up Foundation (Ivory)
- Rimmel London Wake Me Up Concealer (Ivory)
- Rimmel London Glam'Eyes Eyeshadow Palette 'Brixton Brown'
- Rimmel London Black Kohl Pencil Eyeliner
- Collection Extreme 24Hr Felt Tip Liner 
- Loreal Paris Super Liner Blackbuster Liquid Eyeliner
- Maybelline Color Sensational Mattes 'Divine Wine' Lipstick
- Tube of Blood (from a local Pound Store)

Halloween Look: Clown
 

(1) To start off, I applied my usual everyday concealer & foundation. Then I applied the Makeup Revolution Ghost Powder on top, adding as much as was necessary to make my face the shade of white that I wanted. 

(2) Because clowns are associated with colourful makeup, I decided to go for a bright purple and blue eyeshadow look, mixing together the two blue shades from the 'Acid Brights' palette by Makeup Revolution, and then applying the glittery purple eyeshadow from the 'Mermaid VS Unicorns' palette. Afterwards I put on my eyeliner, a line on top of my eyelid with a wing at the end using the Collection liquid eyeliner and using kohl pencil liner on my waterlines as well as under each of my eyes. I also used a thin makeup brush to add a little of the eye shadow colours under my eyes, to match with my eyelids.

(3) Next, it was time to create the iconic diamond shapes that are associated with clown makeup. I simply drew the outlines of these with my Collection liquid eyeliner, a triangular shape under each of the eyes and then again, from my eyelid up over my eyebrows.  After the outline was drawn, I then filled in the shapes using my Loreal blackbuster felt liner, which I also used to add some cute little black dots to the ends of these diamonds and the wings of my eyeliner. 

(4) Now for the 'Chealsea Smile' look. For my base, I created a bruise-like effect and I did this by using some of the eyeshadows from my Revolution 'Acid Brights' palette. First, I used the burgundy shade, drawing a line where I wanted my 'cuts' to be and then smuding it. Next, I added a little of the dark brown eyeshadow from my Rimmel Glam'Eyes palette, as well as some black from the Resolution palette (smudging this too) until I was happy with the colouration of my 'bruise'.

(5) Over this line of eyeshadow, I applied the Makeup Revolution liquid latex. It is very runny so I decided to add a little to a bowl and use a makeup brush to paint it on. It tells you to apply the latex in layers, so I added a little and waited a few minutes for it to dye before then applying a second coat. The liquid latex is white when it comes out of the tube, but it dries completely clear.

Halloween Look: Clown
Here are some of the pins that I found my inspiration from :)

(6) Doing the bloody bits is my favourite part! You need special SFX fake blood to apply over the top of the liquid latex, however I just one of those £1 tubes from the Poundstore so I had to apply it around the outside of the 'cut' that I'd created (I used cotton buds to do this). I made this very messy-looking because well, wounds are messy with jagged edges, so I wanted to create that look. This is perfect for me since I'm not the best at applying makeup, haha! I made it look like droplets of blood were dripping under the wound, and also under my lip. 

(7) To colour-in the 'cut' itself, I went back to the Makeup Revolution face paint palette, which is specifically made for SFX makeup and thus it can be applied on top of the now dried latex. This palette has strong pigmented, great quality paints inside, of which shades are labelled based on the effects that they create, e.g. dried blood, bruise, fresh blood. I again used cotton buds for this part of the makeup. I added a layer of the lighter 'fresh blood' red first, then went over it with the paler brown shade, and finally opted for the 'dried blood' dark crimson red colour. 

(8) I finished up this part of my face by adding a shade of lipstick that is the closest to crimson that I own, Maybelline's 'Divine Wine'. I really liked how this looked with the blooded cut effect surrounding it.

(9) The finishing touch that I did to complete my Creepy Clown look was to add a big bruise onto one of my cheeks, because I just felt like I needed something more. I used the same eyeshadow shades that I did previously as a base for my 'cut', the burgundy, brown and black. Then I used the dark red and pale brown face paints over the top, and then ta-da! I was fully transformed into a spooky Halloween-esque clown! 

I can now finally show you what my Creepy Clown makeup looked like... 

Halloween Look: Clown
 
(Yes, I used this adorable starry snapchat filter because by the time, I'd played around trying to create my own homemade wax and experimented with the latex and blood look, it was evening and the lighting was crap. Ooops #BloggerProblems. I really need to invest in softbox lighting!). 

Halloween Look: Clown

What do you guys think of my Creepy Clown look? I totally should have added a red dot to my nose as this is a symbolic clown feature but I'm still really happy with how everything turned out. I now know what else I'll need to do to create an even better clown next year, and for someone who's not the best at makeup, I thought this was a great attempt (I hope!). Let me know what you think in the comments. Something that was really cool about the liquid latex is how gory it looks when you're removing it. It looks like you're peeling off layers of your skin! I decided to wear my Jack-O-Lantern dress to finalise my look, which you can read more about here. I'm so excited for tomorrow, and there will hopefully be another makeup look up for you all! Do you dress up for Halloween? What are you dressing up as this year?

Thankyou for reading!


Which Halloween look have you always wanted to create yourself?

Share:
Blog Design Created by pipdig