Hi guys! Earlier in the month, I did some festive 'baking' when I made Christmas Bark (you can read all about that here) and I was determined to have a go again before the big day arrived! I have been curious about making my own truffles for a long time, but I could never decide on what flavour to go for. Back in college, a friend of mine made some really delicious truffles that, if I remember rightly, were Bailey's Irish Cream flavoured. I would have loved to have a go at re-creating them but since I don't actually like the liqueur on it's own, I didn't want to waste money on buying a bottle! Just before December began, I started spotting lots of Christmas recipes being shared around on Pinterest and this prompted me to have a look for festive truffles. I was sure there would be some super interesting Christmas-themed truffle recipes on there, and I wasn't disappointed! I found so many that it was pretty tough to decide on which one to have a go at myself. In the end I found a recipe that included chocolate, oreo biscuits and mint, and since these are a few of my favourite things, I opted for this one! I hope that you enjoy reading about how to make these Christmassy truffles :)
Another reason why I chose this recipe is because I wanted to keep the ingredients checklist as close to a tenner as I could. For this one, you only need five ingredients (although you do need several packs of each, etc.). I modified the recipe slightly to fit what I could find at my local ASDA, because it's only one of those small stores and so didn't have some of the things in stock that I needed. I found the recipe that inspired my Christmas Oreo Truffle over on a blog called Cooking Classy. Here's a link for if you'd prefer to follow their recipe. So what did I need to make my Christmas Oreo Truffles?
Ingredients Checklist
♥ 311g original Oreos (28 individual biscuits, two regular-sized packets wise).
♥ 171g soft cheese (I chose to use Philadelphia, one standard container is 180g).
♥ 2 big bars of white chocolate (I used the 150g bars from ASDA, and I actually very much underestimated how much chocolate I would need so only bought one, oops! I definitely recommend at least one and a half bars).
♥ Vanilla flavouring/essences (optional).
♥ Five Candy Canes (to crush up and sprinkle on top of your truffles!)
♥ Other things you'll need: some grease proof paper to stop your truffles sticking to the tray/plate you place them on to set, spoons for staring, something to use to crush up the ingredients... I chose to use a rolling pin, and bowls for mixing the ingredients in.
Recipe for Christmas Oreo Truffles
♥ As always, the first thing that you should do is prep your baking tray by covering it with a sheet of grease-proof paper so that you don't have to do it later. Then it's time to weight out all of your ingredients.
♥ The next thing that I did was crush up my Oreo biscuits. In the original recipe, they used mint flavoured Oreos, which I absolutely love so I was gutted when my ASDA store had none! I wanted to make peppermint flavoured truffles to make them more festive, but I had to settle for original Oreos. It's not too much of a problem because they are yummy, but it just makes my truffles that little bit less Christmassy. To crush my Oreos, I put one handful of biscuits at a time into a plastic sandwich bag and crushed them with the end of a rolling pin. After each lot was crushed, I tipped them into a bowl and crushed some more, and repeated this until I had a big bowl of Oreo crumbs (that was very hard to stop myself from eating haha!).
♥ I had already weighed out the soft cheese in a large mixing bowl, so before adding the crushed Oreos, I mixed some vanilla flavouring into the cheese. This is optional, but I am a very fussy eater and not the biggest fan of cheeses so I wanted to make sure that it tasted nice and sweet. As for measurements, I just fill the cap of the flavouring bottle. I used three caps worth of vanilla flavouring, but this is all up to you :) Add a little, stir and taste until you are happy with it :)
♥ Now everything that your flavouring is added, you're ready to pour all of those Oreo crumbs into the soft cheese. Then you have to mix it all up together, keep stirring and squishing until it has all been thoroughly mixed together.
♥ Roll up the mixture into little balls using your hands, and place them onto the baking tray or plate that you set aside earlier. You can make your truffles however big or small you like. My mixture made 22 regular sized truffles :) Now, pop these into the fridge for an hour or so.
♥ Once your truffle balls have set in the fridge for an hour, take them out and prepare your candy cane topping. The same way that you crushed your Oreos earlier, smash up your candy canes in a plastic sandwich bag. I also broke up the candy canes into the smallest pieces that I could as I put them into the bag, as this makes the crushing part much earlier.
♥ It's now time to melt your chocolate. You can do this the old-fashioned way, by placing your chocolate into a dish above a pan of boiling water. However I chose the easy opt and melted my chocolate in the microwave. Make sure that if you use the microwave, put your chocolate in for short 20-40 second intervals, stir and then put back in again. This way you pretend any chocolate burning on the bottom of your dish. Keep doing this until it's all melted.
♥ It's now time to melt your chocolate. You can do this the old-fashioned way, by placing your chocolate into a dish above a pan of boiling water. However I chose the easy opt and melted my chocolate in the microwave. Make sure that if you use the microwave, put your chocolate in for short 20-40 second intervals, stir and then put back in again. This way you pretend any chocolate burning on the bottom of your dish. Keep doing this until it's all melted.
♥ The next part of your truffle making can get a little messy! I always make a mess whilst baking though so you might not get chocolate all over your kitchen side like I did, haha! Dip your truffles one by one into the melted chocolate. Roll them around to coat them and pop them back onto your grease-proof paper.
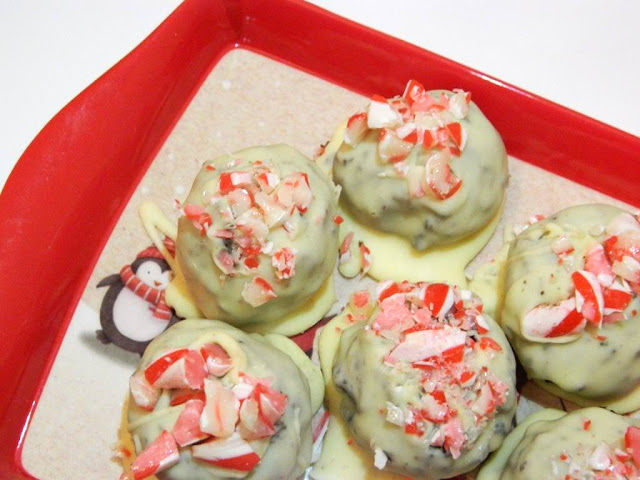
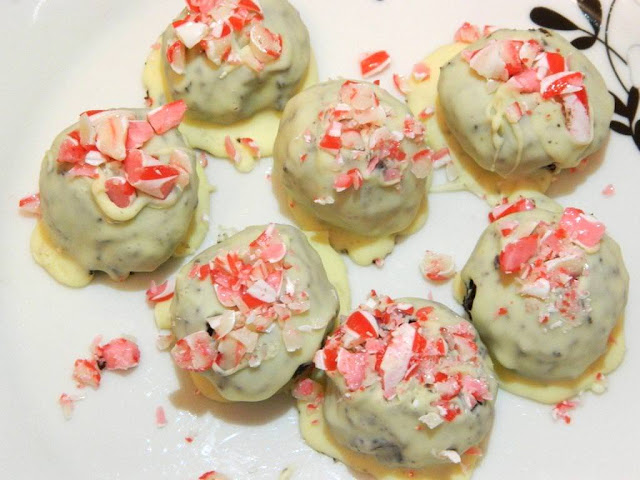
♥ After you've coated a few of your truffles in chocolate, remember to add a sprinkle of crushed candy cane pieces on top before the chocolate sets. I did this row by row, coated them with melted white chocolate and then dotted a pinch of crushed candy cane on top. This adds the Christmassy look and taste to your truffles! If you want you, you could totally add a few little festive icing decorations on top of your truffles too. I've seen people make them look like little Christmas puddings by adding icing cut into two mini berries and two holly leaves. How cute is that!?
♥ Before your truffles are perfect to eat, you need to pop them back into the refrigerator for another hour or so to harden the chocolate. Then they are all done! And ready to serve with your other Christmas day foods, or even package up into bags to give as gifts to your family & friends. Let them sit at room temperate for a while before putting them into a bag though :)
♥ Before your truffles are perfect to eat, you need to pop them back into the refrigerator for another hour or so to harden the chocolate. Then they are all done! And ready to serve with your other Christmas day foods, or even package up into bags to give as gifts to your family & friends. Let them sit at room temperate for a while before putting them into a bag though :)
I think that my truffles turned out really cute! Can truffles really be cute!? But I think they are (haha!) with their little candy cane decorations! I'm happy with how they've turned out, even though they are rather messy looking! I seriously don't know how people get their chocolate-coating to look so neat! Maybe they sneakily break off most of the pooled chocolate at the bottom of the truffle before they take their photos ;) Or they are just much more neat than I am!
There are a lot of little things that I would do differently, such as get more chocolate! As I mentioned earlier, I completely underestimated how much melted chocolate I would need to coat my truffles. So they don't have as much of a thick coating as others I've seen, and you can sort of see the dark truffle mixture underneath. Oh well, I'm sure they will taste great still. Not only did I not have enough chocolate to coat them, but I also didn't have enough to cover all of my twenty plus truffles! Luckily, I had some milk chocolate in that I used to coat the last few :) They look awesome too so if you prefer milk chocolate, you could always opt to use this in your own recipe. I just thought that white chocolate made them look more like little snowballs.
I hope that you've all enjoyed reading all about how I made my Christmas truffles! I'd love to hear what you think in the comments. Have an awesome weekend guys!
Thankyou for reading!
♥
Have you ever made truffles?
What is your favourite thing to make or bake at Christmas Time?


No comments
Post a Comment