Big This Week

Recent Posts

Thursday, 21 December 2017

How To Make Christmas Oreo Truffles | Blogmas #21

Hi guys! Earlier in the month, I did some festive 'baking' when I made Christmas Bark (you can read all about that here) and I was determined to have a go again before the big day arrived! I have been curious about making my own truffles for a long time, but I could never decide on what flavour to go for. Back in college, a friend of mine made some really delicious truffles that, if I remember rightly, were Bailey's Irish Cream flavoured. I would have loved to have a go at re-creating them but since I don't actually like the liqueur on it's own, I didn't want to waste money on buying a bottle! Just before December began, I started spotting lots of Christmas recipes being shared around on Pinterest and this prompted me to have a look for festive truffles. I was sure there would be some super interesting Christmas-themed truffle recipes on there, and I wasn't disappointed! I found so many that it was pretty tough to decide on which one to have a go at myself. In the end I found a recipe that included chocolate, oreo biscuits and mint, and since these are a few of my favourite things, I opted for this one! I hope that you enjoy reading about how to make these Christmassy truffles :) 


Another reason why I chose this recipe is because I wanted to keep the ingredients checklist as close to a tenner as I could. For this one, you only need five ingredients (although you do need several packs of each, etc.). I modified the recipe slightly to fit what I could find at my local ASDA, because it's only one of those small stores and so didn't have some of the things in stock that I needed. I found the recipe that inspired my Christmas Oreo Truffle over on a blog called Cooking Classy. Here's a link for if you'd prefer to follow their recipe. So what did I need to make my Christmas Oreo Truffles? 


Ingredients Checklist

311g original Oreos (28 individual biscuits, two regular-sized packets wise).

171g soft cheese (I chose to use Philadelphia, one standard container is 180g). 

2 big bars of white chocolate (I used the 150g bars from ASDA, and I actually very much underestimated how much chocolate I would need so only bought one, oops! I definitely recommend at least one and a half bars). 

Vanilla flavouring/essences (optional).

Five Candy Canes (to crush up and sprinkle on top of your truffles!) 

Other things you'll need: some grease proof paper to stop your truffles sticking to the tray/plate you place them on to set, spoons for staring, something to use to crush up the ingredients... I chose to use a rolling pin, and bowls for mixing the ingredients in. 


Recipe for Christmas Oreo Truffles 

As always, the first thing that you should do is prep your baking tray by covering it with a sheet of grease-proof paper so that you don't have to do it later. Then it's time to weight out all of your ingredients. 

The next thing that I did was crush up my Oreo biscuits. In the original recipe, they used mint flavoured Oreos, which I absolutely love so I was gutted when my ASDA store had none! I wanted to make peppermint flavoured truffles to make them more festive, but I had to settle for original Oreos. It's not too much of a problem because they are yummy, but it just makes my truffles that little bit less Christmassy. To crush my Oreos, I put one handful of biscuits at a time into a plastic sandwich bag and crushed them with the end of a rolling pin. After each lot was crushed, I tipped them into a bowl and crushed some more, and repeated this until I had a big bowl of Oreo crumbs (that was very hard to stop myself from eating haha!). 

I had already weighed out the soft cheese in a large mixing bowl, so before adding the crushed Oreos, I mixed some vanilla flavouring into the cheese. This is optional, but I am a very fussy eater and not the biggest fan of cheeses so I wanted to make sure that it tasted nice and sweet. As for measurements, I just fill the cap of the flavouring bottle. I used three caps worth of vanilla flavouring, but this is all up to you :) Add a little, stir and taste until you are happy with it :) 

Now everything that your flavouring is added, you're ready to pour all of those Oreo crumbs into the soft cheese. Then you have to mix it all up together, keep stirring and squishing until it has all been thoroughly mixed together.

Roll up the mixture into little balls using your hands, and place them onto the baking tray or plate that you set aside earlier. You can make your truffles however big or small you like. My mixture made 22 regular sized truffles :) Now, pop these into the fridge for an hour or so.

Christmas Oreo Truffles

Once your truffle balls have set in the fridge for an hour, take them out and prepare your candy cane topping. The same way that you crushed your Oreos earlier, smash up your candy canes in a plastic sandwich bag. I also broke up the candy canes into the smallest pieces that I could as I put them into the bag, as this makes the crushing part much earlier. 

  It's now time to melt your chocolate. You can do this the old-fashioned way, by placing your chocolate into a dish above a pan of boiling water. However I chose the easy opt and melted my chocolate in the microwave. Make sure that if you use the microwave, put your chocolate in for short 20-40 second intervals, stir and then put back in again. This way you pretend any chocolate burning on the bottom of your dish. Keep doing this until it's all melted.

The next part of your truffle making can get a little messy! I always make a mess whilst baking though so you might not get chocolate all over your kitchen side like I did, haha! Dip your truffles one by one into the melted chocolate. Roll them around to coat them and pop them back onto your grease-proof paper. 

After you've coated a few of your truffles in chocolate, remember to add a sprinkle of crushed candy cane pieces on top before the chocolate sets. I did this row by row, coated them with melted white chocolate and then dotted a pinch of crushed candy cane on top. This adds the Christmassy look and taste to your truffles! If you want you, you could totally add a few little festive icing decorations on top of your truffles too. I've seen people make them look like little Christmas puddings by adding icing cut into two mini berries and two holly leaves. How cute is that!? 

Before your truffles are perfect to eat, you need to pop them back into the refrigerator for another hour or so to harden the chocolate. Then they are all done! And ready to serve with your other Christmas day foods, or even package up into bags to give as gifts to your family & friends. Let them sit at room temperate for a while before putting them into a bag though :) 
Christmas Oreo Truffles


Christmas Oreo Truffles

Christmas Oreo Truffles

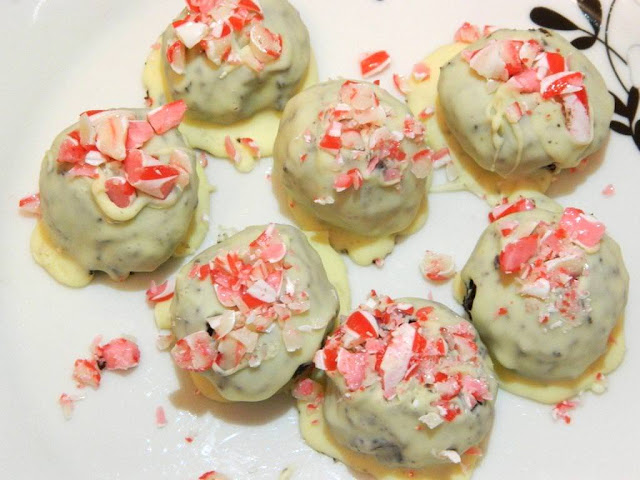
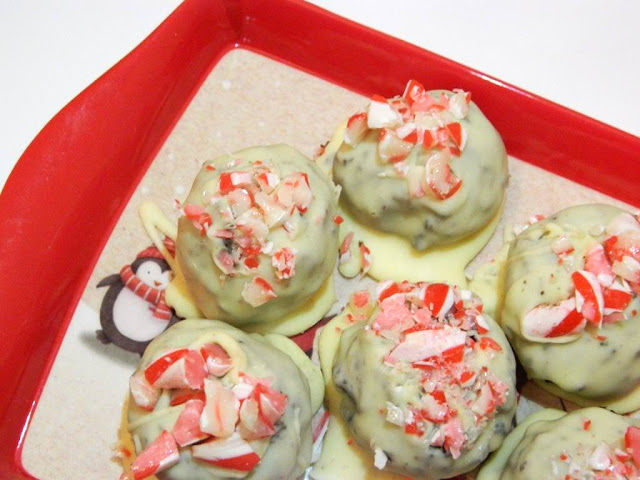
I think that my truffles turned out really cute! Can truffles really be cute!? But I think they are (haha!) with their little candy cane decorations! I'm happy with how they've turned out, even though they are rather messy looking! I seriously don't know how people get their chocolate-coating to look so neat! Maybe they sneakily break off most of the pooled chocolate at the bottom of the truffle before they take their photos ;) Or they are just much more neat than I am! 

There are a lot of little things that I would do differently, such as get more chocolate! As I mentioned earlier, I completely underestimated how much melted chocolate I would need to coat my truffles. So they don't have as much of a thick coating as others I've seen, and you can sort of see the dark truffle mixture underneath. Oh well, I'm sure they will taste great still. Not only did I not have enough chocolate to coat them, but I also didn't have enough to cover all of my twenty plus truffles! Luckily, I had some milk chocolate in that I used to coat the last few :) They look awesome too so if you prefer milk chocolate, you could always opt to use this in your own recipe. I just thought that white chocolate made them look more like little snowballs. 

Christmas Oreo Truffles


I hope that you've all enjoyed reading all about how I made my Christmas truffles! I'd love to hear what you think in the comments. Have an awesome weekend guys! 


Thankyou for reading!


Have you ever made truffles? 

What is your favourite thing to make or bake at Christmas Time?


Share:

Tuesday, 12 December 2017

How To Make Christmas Bark | Blogmas #12

Hey lovelies! Today has been one of those super busy days, I haven't felt like I've relaxed much at all and I am so tired! I've been packaging up things that I've sold on eBay and shipping them, I've been making the delicious Christmas treats that my Blogmas post today is going to be all about, and I went to my brothers house for tea tonight. I hadn't been over since he first bought his new house so it was really cool to see it all now that he's revamped and decorated it. It's also my nephew's birthday tomorrow so I've been getting his present ready, plus going through more boxes in my bedroom, throwing away things and organising others to be donated to the charity shop. I can't wait to have a nice relaxing bath after I've finished this post! 

I have been very much looking forward to making this Christmas Bark! I've been wanting to make some chocolate bark for ages now, after seeing so many different variations on Pinterest... Halloween bark, Christmas bark, even unicorn bark! I will get around to making them all eventually but since it's Christmas, I just had to have a go at making a chocolate bark with a festive twist. This is my first making/baking project of the year, but it definitely won't be the last! So, keep reading to find out how I made my Christmas Bark :) 


Christmas Bark Recipe

I am really happy with how my Christmas Bark turned out, so I thought I'd share a recipe and method with you all so that you can make some yourself this December :) If you checked out my Countdown to Christmas Checklist post yesterday, I included do some festive baking to my list and although this is not technically baking because there's no oven involved, I still feel like I've achieved something already off my list, so I'm off to a good start! I think that making Christmas Bark is a great festive activity to do for many reasons. You can make it to suit your own tastes, because you can add everything you want into your chocolate! It is easy to make so you don't need to be a masterchef baker, haha! And also it's perfect for kids to make too! 

What will you need to make your own Christmas Bark? 

A few of the big bars of white chocolate (I used three 150g bars from Asda)

Some milk chocolate to drizzle over the top of your bark (I used a bar of Cadbury's Dairy Milk)

All the sweeties!! This is for your toppings and filling :) (I used Jelly Beans, Smarties and Mini Marshmallows). You can stick to sweets with a Christmassy colour theme if you want to!  

Candy canes (to crush up and sprinkle throughout).

Other things you'll need: a pan and a large glass bowl (to melt your chocolate over), wooden spoon, a baking tray and some grease-proof paper. 


How do you make your Christmas Bark? 

The first thing that you need to do is line your baking tray with a piece of grease-proof paper. This is one that your chocolate bark doesn't stick to your tray! 

Then, throw however many of your sweets that you want into the tray, to later pour your chocolate over & mix it, so that you have some sweets inside your bark too! 

Now, it's time to melt your white chocolate. You can use any other chocolate you wish; some people prefer to have a milk chocolate bark with white chocolate drizzled on top instead, for example :) Pour your boiling water into a pan (there is no need to add this pan to a heat source because your water is already boiling. Break up your chocolate into smaller pieces so that they are easier to melt, add them to the big glass bowl and put this on top of the pan of boiling water. The steam will cause the chocolate to slowly melt. 

♥  Keep occasionally staring your chocolate until it has all melted. There's a lot of chocolate to melt so it can take a while. Ngl I popped mine into the microwave to speed things up... 30 seconds at a time and stirring in between.

How To Make Christmas Bark

♥  Once all of your white chocolate has melted, you can pour it into your baking tray on top of the sweets you placed in there earlier. Stir them in a little before smoothing it all out with your spoon and then get to decorating!!

This is really fun part!! Drop your sweets all over your melted chocolate mixture to decorate it however you want! I crushed up my candy cane by popping it into a plastic sandwich bag and hitting it with a metal spoon until it was all crushed up and perfect for sprinkling over the top of your chocolate :) 

Just before you're ready to pop your chocolate into the fridge for 1-2 hours to set, I left mine for a lot longer just to be sure, it's time to melt your milk chocolate to drizzle over the top as a finishing touch. You can either do this with the boiling water again as you did with your white chocolate or as I did, pop it into the microwave. Then using a spoon, let the milk chocolate pouring over your mixture in the baking tray. 

Ta-da! After a few hours in the fridge, your bark will be set and ready to break! Your grease-proof paper will make it easy to remove your chocolate from the baking tray, then all I did was turn it upside down, put it back down into the baking tray and used the handle of a spatula to smash up my chocolate bark. You will be left with some scrumptious chunks of treat-filled chocolate to share with your loved ones this Christmas! 


Christmas Bark makes the perfect homemade gift to give to your friends and family on Christmas Day, especially since you can make it with their favourite sweets. You can pop a couple of pieces into a plastic bag, and seal it with a sparkly festive ribbon, or a gift-wrapping bow! You could even drop some of the left over sweeties into the bag with the Christmas bark :) I might gift some to my brothers this year! 

Overall, it was really fun to make this Christmas Bark and I am delighted with the outcome, even though to be honest I did want my bark to be much thinner than this, however I realised that we only had deep, square baking trays, oops!

I've eaten a piece and it's very yummy! Let me know if you make some for yourselves guys :) 


Thankyou for reading! 


Are you a fan of candy canes? If so, what flavour is your favourite? 
I love the traditional peppermint ones, but I've tried spearmint ones and they were amazing!


Looking for more festive recipes to try? Check out my previous Blogmas posts:
| Gingerbread Men | Strawberry Santas | Festive Shortbread

Share:

Thursday, 24 December 2015

Blogmas Day 24 | Strawberry Santas


Happy Christmas Eve! 

 I'm in such an excited mood right now! I cannot wait for tomorrow! I'm also making my gingerbread house later today so I'm really looking forward to that even though it was really difficult last year to get the walls of the house to stick together and I'm not the best at putting together things that require accuracy so it took a long time to complete it, but at the end I get to decorate it and that's the best part. For today's blogmas I'm going to show you the adorable Strawberry Santas that I made yesterday evening. I was inspired to make them because of this year's Aldi Christmas advert and I love the way they turned out (even if they are a little messy!). 


They were really easy to make and will look great sitting on the table with the rest of your Christmas food. The original recipes all include cream cheese but I don't like cheese (unless it's red leicester, which is the only cheese I'll eat other than Walkers cheese & onion and Wotsits crisps. I'm a very fussy eater!) so I tweaked the recipe to suite me. Here is a link to the proper recipe :) This is what I used to make my little strawberry santas... 


To make each of my Santa's, I used large strawberries and whipping cream. I chopped the green tops off and then cut the strawberries so that I would have one part for the body and a pointed part for the hat. Then I simply whipped the creamed using an electric whisk and using a spoon placed a blob of cream on top of one half of the strawberry, sat the hat part on top and then added a tiny bit of cream to the top of the hat. I also attempted to use the cream to make buttons on the Santa's but as you can see from my photo, I didn't do a very good job of that but I'm sure you'll all be much neater than me when making your own haha :) Finally, I popped 2 chocolate chips into the cream to make eyes, and when I'd completed all of my strawberries I sprinkled some icing sugar over them to look like snow. 


 Here's is my finished Strawberry Santa Gang! They are so cute! 


 Have you done any festive baking or making this year?
What's your favourite Christmas treat?


Share:

Wednesday, 23 December 2015

Blogmas Day 23 | Festive Baking #3

As promised, today's blogmas is going to be another baking-themed post. I've been really in the mood to bake lately, probably because of all the Christmas food adverts that have been on TV. I've been excited for Christmas dinner all week! And, the buffet we have every Boxing Day. So much food! Today, I made shortbread biscuits and of course I decorated them all Christmassy. 


Here are my finished biscuits! I used some of the left over cake decorations from making yesterday's Christmas cupcakes and some blue fondant icing. I attempted to hand-draw some snowflakes, too and although they are rather messy, I still love how they look. Do you want to have a go at making your own Christmas shortbread? Here's what you'll need: 

For the shortbread biscuits
125g butter 
180g plain flour 
55g caster sugar
(optional) a few drops of vanilla flavouring

For the decoration
You can decorate your biscuits however you like but this is what I used :) 
125g icing sugar 
15ml warm water (but you may need more)
Packet of ready-to-roll fondant icing
Christmas cake sprinkles and characters 


 How to make the shortbread biscuits 

(1) Preheat the oven at 190ºC/ Gas Mark 5 
(2) Mix together the caster sugar & butter until it's a light, fluffy mixture
(3) Next, stir in the flour and keep mixing until you have a crumbly mixture
(4) Now you can knead the mixture together into a ball ready to roll
(5) Sprinkle some flour onto the surface you are about to roll out your dough on to prevent it from sticking, as well as the rolling pin too. 
(6) Roll out the dough until it's around 1 & a half cm thick and cut out any shaped biscuits you want
( I wanted circular biscuits but didn't have a cookie cutter so I used a glass. I really need to buy a circular cutter! haha I did however have a heart cookie cutter so I used the last bit of dough to make 2 little heart biscuits). 
 (7) Grease a baking tray and place on the biscuits ready to pop into the oven. 
The recipe I was following (find it here) said to put the biscuits into a fridge for 20 minutes before baking but since the other recipes I had a peep at didn't include this step, I decided to just bake my biscuits straight away.
(8) Bake your biscuits until they are light golden brown, for 15-20 minutes. 


 How I decorated my shortbread biscuits 

  For the icing covered biscuits, place the icing sugar into a mixing bowl and gradually mix in 15ml of warm water, adding a little bit each time and stirring. It says on the box that you may have to add more water and I did have to use more, I used around 30ml altogether. Then simply, spread the icing sugar on top of your biscuits and add any decorations you want. 

For the blue snowflake biscuits, I used ready-to-roll fondant icing. Sprinkle a little icing sugar (or you could use flour if you don't have any icing sugar) to stop it sticking to the surface and roll out as you did with the shortbread dough for the biscuit preparation. Then, use cookie cutters to cut shapes out of the fondant. I used the same glass I used to cut out my circular biscuits so that the icing would fit perfectly on top. I then decided to make another batch of icing sugar and using a knife, draw a snowflake onto four of my biscuits. 


Here are some close up photos of my shortbread biscuits


Just after taking these photos, I couldn't resist eating one of the snowflake biscuits. It was delicious!

I hope you enjoyed reading 


What's your favourite kind of biscuit? Have you ever make shortbread? 


Share:

Tuesday, 22 December 2015

Blogmas Day 22 | Festive Baking #2

I had a fun afternoon doing some festive baking. For blogmas day 4, I made gingerbread men which were really yummy and would make great homemade Christmas presents for your loved ones. Over the last couple of weeks each time my mum went shopping and spotted some Christmassy cake decorations, she bought them for me so today I finally decided to use them and baked some cupcakes with the help of my niece. 


For the cupcakes, I used a simple fairy cake/cupcake recipe and I topped them with buttercream. Here's what you'll need:

For the cake
100g self-raising flour
100g margarine 
100g caster sugar
2 medium eggs 
Don't forget to buy paper cases 

For the buttercream
100g icing sugar 
50g butter or margarine
(optional) flavourings
(optional) food colouring 
.... I used red food colouring for a few of mine :

& cake decorations! There are some lovely toppings available for Christmas

 
To begin with, set the oven to 180ºC / Gas Mark 4 and pre-heat whilst you are preparing your cake mixture. First, mix the butter and caster sugar together until you have a light and fluffy mixture. Then, slowly fold the egg and flour into the mixture by adding a little bit at a time and mixing until you have a creamy mixture. Spoon the mixture into the paper cases and pop into the oven for 15 minutes. 

Once the cupcakes have been given time to cool, you can make the buttercream. Mix the icing sugar and butter/margarine together until it's creamy and add any flavourings or colourings you want. Now, it's time to decorate them. My favourite part! :) My niece also really enjoyed decorating her cupcakes and wanted to give them to her parents for Christmas. Whilst we were adding the toppings to our cakes, my other niece and nephew came over to give us all Christmas cards and so they joined in, too. 


How adorable is this little Christmas tray? It's from Home Bargains. The cake decorations next to it includes 5 different toppings. The green one is gorgeous! It looks like glitter :) They were from B&M Bargains.


These tubes of cake decorations are so cute with the santa & elf cartoon designs. The middle tube is filled with little white & red candy canes. They are also from Home Bargains. I love all the Christmassy things you can buy there! On the right side of the photo, you can see some little cake toppers. The pack from B&M Bargains contains penguins, snowmen and more. 


Ta-Dah! Here are our finished cupcakes I decided to pour a mixture of all the cake toppings into a bowl and dip the cupcakes in to cover them because trying to sprinkle the decorations on top was messy; they went everywhere! I think they look really festive and cute, and my family loved them. 

Thanks for reading! Tomorrow I'll be doing some more festive baking.


Have you done any festive baking this year? If so, please link me :) I'd love to have a read. 


Share:

Friday, 4 December 2015

Blogmas Day 4 | Festive Baking #1


One of the things I love most about December is all the festive baking potential. There is so much inspiration on Pinterest and on Christmas adverts, and I'm constantly getting new ideas of what I want to have a go at baking next. Today, I made some gingerbread men and decided to do a step-by-step post :) If you have a go at making some yourself, let me know. Hope you all enjoy this post!

What you'll need to make gingerbread men

350g Plain Flour
175g Light Brown Soft Sugar (it actually looks like sand!)
100g Butter
1 Medium Egg (I used a large one, oops!)
4 tablespoons of Golden Syrup
1 teaspoon of Bicarbonate of Soda
1 & a half teaspoons of Ground Cinnamon
5 & a half teaspoons of Ground Ginger 

Kitchen scales
1 Large Mixing Bowl
1 Rolling Pin
1 Wooden Spoon
Little bowls for measuring ingredients out
Teaspoons & Tablespoons
1 or 2 Baking Trays    
Gingerbread Men Cookie Cutters  


    Remember to preheat your oven before you begin preparing your gingerbread men. Set it to 180C (Gas Mark 4). Start by adding the flour, butter, bicarbonate of soda, ginger & cinnamon into the large mixing bowl. Mix all the ingredients together using your hands, until the mixture is crumbley and all butter has been rubbed in. Here's a photo of what the mixture should look like before you begin the next step:

 
 Next, you need to add the sugar, egg and golden syrup & stir until it looks like a firm dough-like mixture. Then use your hands to roll the mixture into a ball. Sprinke flour on your work surface and onto the rolling pin to prevent the dough from sticking. For the final stage before cooking, roll the gingerbread dough out making sure it's 5mm thick and then use your cookie cutters to make shapes.


 Grease your baking trays with butter to stop the gingerbread men sticking and put into the oven for 15 minutes. Be sure to check after 10 minutes because in some ovens the gingerbread men may be golden and ready to be taken out after 12 minutes. When you've taken them out of the oven, leave them to cool for at least 15 minutes. Here is where I sourced my recipe. Before putting the gingerbread in the oven, I used a knife to make a little smile on their faces.


What I used to decorate my gingerbread men

1 packet of smarties (to use for buttons & eyes)
 1 bar of white chocolate (to use to stick the smarties to the gingerbread men. You could use icing, too).  
1 large glass bowl
1 pan
1 teaspoon  

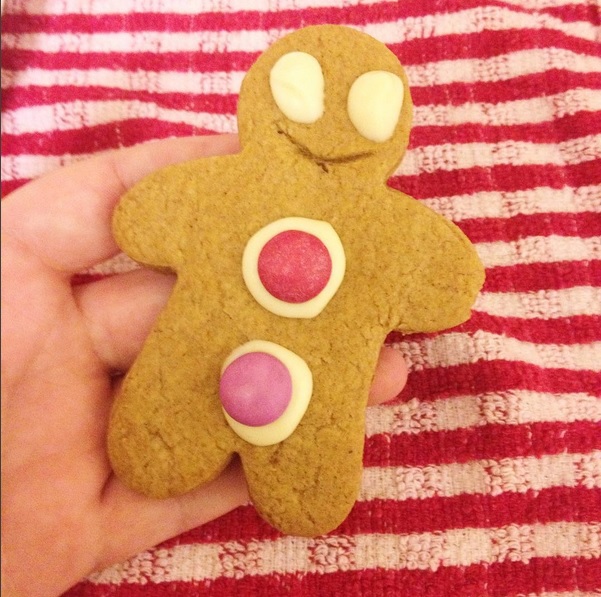
 I made 3 different sizes of gingerbread men because I bought a 3 pack of cookie cutters from The Works for £2 (Find them here). First, break up the chocolate into pieces and add it into the glass bowl, then add boiling water into the pan. Next, place the glass bowl over the pan of boiling water to melt the chocolate. Once it had melted, I simply added a small blob of chocolate onto my gingerbread men using the teaspoon, and popped a smartie on top. For the smaller gingerbread men, we used chocolate for the eyes because their heads were too small for the smarties. My brother wanted to join in and help with this part :)


 I'm quite proud of my little gingerbread men. They look so cute!


 Thanks for reading!


Do you have any festive baking planned? Are you taking part in Blogmas?
 I'll be baking more yummy festive treats soon.


Share:
Blog Design Created by pipdig