Monday, 31 October 2016

Happy Halloween! | Blogtober

Happy Halloween Everyone! I'm lovin' life today! I dressed up even though I had no where interesting to go, rockin' my new pumpkin print dress and my custom vampire fangs. I've had my Halloween playlist going all day and have caught up with American Horror Story. I've carved my Jack-O-Lantern and I have my night of spooky movies planned. First up, The Devils Rejects, my favourite horror movie. I'd love to hear all about how you've spent Halloween. So, this is the last of my Blogtober Challenge posts and I've really enjoyed writing them all. It has been pretty hard to keep up with blogging everyday, especially since I've been ill with flu-like symptoms basically throughout the entirety of October, so I'm feeing a little proud of myself. Well done to all of my fellow bloggers who've been posting for Blogtober too! 

Happy Halloween

Since I haven't really done much to blog about today, I thought I'd just share some photographs of my pumpkin carving process because I know that not everyone carves pumpkins or knows how to create a Jack-O-Lantern and so I wanted explain how to do it :)

Pumpkin Carving

Pumpkin Carving

I'm so glad that my mum managed to find me a pumpkin last minute today! With all the preparations for my friend's Halloween party at the weekend, I completely forgot to get one. She avoided the supermarkets because they have usually sold out on the day, and went to my hometown's little market to the fruit & veg stall. My pumpkin was only 60p! To carve your pumpkin you will need a good knife and something to scoop out all of the inside of the vegetable. Unless you're like me and love getting stuck in and messy! I use my hands :) You can pick up these cute little pumpkin carving kits in October that include a carving knife that's safe for kids and clumsy people like me, a scoop and a little tool to help you draw on whatever design you want onto your pumpkin. Tip: put a bag down on the surface you'll be preparing your Jack-O-Lantern on because of all the mess.

First you want to 'draw' your design onto the pumpkin, by draw I mean etch/engrave your design so that you have an outline to work with. I always go for a spoopy Jack Skellington from The Nightmare Before Christmas, because it just looks adorable and it's a nice simple design. You also need to draw a circle around the top of your pumpkin to cut out your lid. I forgot to get a photograph of this stage, oops. Start by cutting this circle out of the top of your pumpkin, and then you can pull the contents out of your pumpkin, all of the seeds and orange stringy mush. It's really fun!

Pumpkin Carving
Pumpkin Carving


As you can see above, I also decided to cut out the eyes of my design, too. I did this so I could use them to hold onto the pumpkin. After you've emptied your pumpkin, making sure you get the inside of your Jack-O-Lantern as smooth as you can so that there's no hangy bits that can get burnt when you put candles inside later. You'll need to neaten the underside of the lid you cut out earlier, cutting off any of the stingy flesh of the pumpkin. Do this careful because if you change the shape of the lid, it wont fit back on top of your pumpkin. 

Now it's time to carve your design into the pumpkin. Just cut around your outline like you did with the lid. When you are done, you have yourself a Jack-O-Lantern! Just add candles and its ready to display.

Pumpkin Carving

How cute is my pumpkin!? He's now in our living room window :) Did you carve a pumpkin this year? What design did you do? I'm the only one in my house who makes a Jack-O-Lantern every year, haha. I'd decorate the whole house too if they'd let me! 

I thought I'd share a few more photographs of my day, of my Halloween outfit and some photographs I took on my walk to the shop to get myself some snacks ready to watch movies. Our local pub is really enthusiastic about Halloween and have such fabulous decorations every year. I snapped a few photographs when I was walking by. This year's theme was a horror carnival, with scary clowns too of course! 

I hope you've all enjoyed my Halloween ramblings! I hope you've all had a wonderful Halloween weekend & day. Also, Blessed Samhain to my fellow pagans! I hope you've liked my Blogtober posts as much as I have sharing them with you all. I wanted to finish Blogtober Day 31 with a roundtop of my favourite posts of the month. Enjoy!


Thanks for reading!


Why do you love or hate Halloween? 
What's your favourite or least favourite thing about this holiday?

Share:

Sunday, 30 October 2016

Custom Vampire Fangs by Scarecrow Review | Blogtober

Happy Halloween's Eve everyone! I hope you've all had an awesome weekend, filled with spooky fun :) Last night, I went to my friend's Halloween party, and had a fabulous time, which included getting very drunk, seeing some of my lovely friends that I haven't seen since college, meeting lots of new people and squealing with excitement when the nightclub we were in played Time Warp from The Rocky Horror Picture Show! I decided that this year I wanted to dress up as a vampire, and had a little research around online for some decently priced, realistic- looking fangs. There were lots of great reviews for custom vampire fangs by a brand called Scarecrow on Amazon, and after watching a few youtube videos featuring some of their products, I decided to try them out for myself. I thought for Blogtober Day 30, I'd tell you all what I thought of the fangs I bought. Enjoy! 

Custom Vampire Fangs by Scarecrow

Scarecrow sell a few different styles and sizes of fangs, and since I have pretty small teeth I decided to get the 'Small Sexy Deluxe Vampire Fangs'. I paid between £10-£12 for them, I can't remember exactly, from Amazon (here's a link). I was super excited to try them out! Gone are the days when we had to put up with some dreadful cheap plastic fangs that made you drool and not be able to pronounce words whilst you were wearing them! These awesome little fangs come as two individual teeth that you then follow the instructions to mold them so that they are customised for your own teeth. How cute is the packaging though!? How your fangs come in a miniature coffin container :)


Custom Vampire Fangs by Scarecrow


Custom Vampire Fangs by Scarecrow


Custom Vampire Fangs by Scarecrow

Inside the coffin case, you will find your two vampire fangs on a pretty crimson presentation cushion and underneath this are all of the things you'll need to customise them. It's super easy to do! For each tooth, you need to use one capsule of the powder you can see above, using the tiny black container to make up a mixture of molding material. 

Once you have emptied one capsule of powder into the container, you add four drops of the liquid provided. Just a heads up, this stuff smells horrible! Using the wooden stick, you mix the liquid and powder together for 30 seconds until you have a gloopy paste that's similar to toothpaste. You then follow the instrutions in the manual/booklet that comes with the fangs, and once you've customised one tooth, you can make up more adhensive paste for the next tooth. I was really impressed with how quick and simple the whole process was to get two fangs that are molded to fit your teeth.


Custom Vampire Fangs by Scarecrow
I have been fascinated with vampires for as long as I can remember. I have memories of playing make-believe games with my friends at nine or ten years old were we would pretend to be vampires. Bram Stoker's Dracula was the first horror movie that I watched and I have adored the whole folklore surrounding these awesome creatures of the night ever since. It was seriously so awesome to wear these fangs! I literally couldn't stop checking myself out, haha! They look so realistic and neat, and I would seriously recommend this brand for anyone who is looking for some vampire fangs to complete their Halloween costumes, or for the cool kids like me who just want to rock a pair of fangs. What do you think of my fangs?

Things I liked about Scarecrow's Small Sexy Deluxe Vampire Fangs 

• I loved that they looked so neat and presentable.  
They were a great size and fit comfortably into my mouth, without making it uncomfortable to close my mouth or anything like that.
• Some of the molding material seaps out of the sides of the fang and fills in any gaps around your actual tooth, it tells you to leave this so that the fangs are more fitted and I think it makes them look better, and even more realistic.
• They are cute as hell, and definitely made me feel sexy :)
• Once you have molded the fangs to your teeth, you don't need to repeat the process again. They are then fully reusable and they just click in and out of your mouth really easily. 
• I thought that I would struggle to speak with them in, but after around half an hour, I could speak perfectly again. 

Some cons about Scarecrow's Small Sexy Deluxe Vampire Fangs 

• You're not supposed to wear them whilst you drink or eat, as you can damage them and/or stain them. I wanted mine for a Halloween party/night out so I had to risk it, and they did get stained which is a shame. However, they were inexpensive so I didn't mind too much, and I was warned.
• I think that drinking also affected the molding material too, as the fangs fit snug onto my teeth earlier in the night without moving, but after a few hours of drinking, one of them kept falling off. Although this is my fault again, for wearing them whilst drinking. I was considering using some fixodent denture adhensive to make sure that they stayed in place, so I could always do that next time.
• As I mentioned above, some of the molding material squeezes out of the sides of the fang when you are customising them and the instructions tell you to leave this to make sure they fit well, and to only cut off any molding material that is visible on top of your tooth/near your gums with a nail clipper. As this molding material dries hard, it's quite rough and I found that some of the parts in between my teeth that the instructions told me to leave there rubbed against the back of my lip and have given me a blister/sore. I might use a nail file to take away any roughness before wearing them again.


Custom Vampire Fangs by Scarecrow

I really love my custom fangs and it's definitely made me interested in trying out the other styles that the company have available. For a little over £10, these fangs are a fabulous quality, so simple to customise and surprisingly comfortable to wear. I got lots of compliments on them. Happy Halloween for tomorrow guys!


Thankyou for reading! 


Have you ever worn any custom fangs before? Same brand? What did you think?
Also, what's your favourite vampire movie/book/character?  

 Are you a fan of Vampires? Check out these related posts: 


Share:

Saturday, 29 October 2016

Halloween Dress | Blogtober

This year, I really wanted to get myself a spooky themed dress to rock on Halloween day! Luckily, when my mum was out shopping last week, she spotted the perfect dress and for today's blogtober, I just wanted to show you all just how awesome this spoopy Halloween print dress is! Enjoy!

Halloween Print Dress


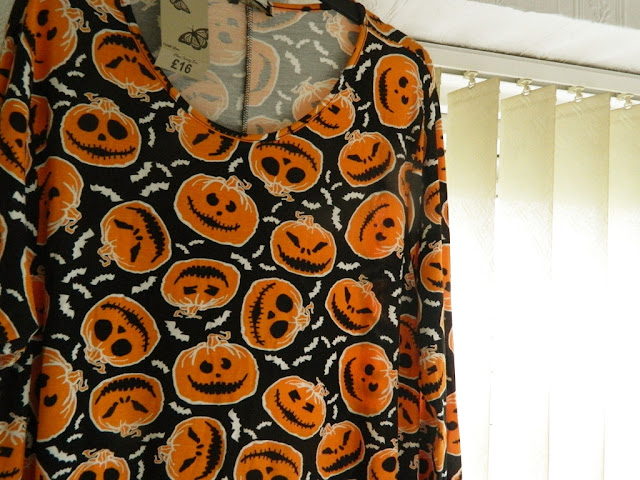
Look how fabulous & adorable this Jack-O-Lantern print is! I love all of the little white bats too. The pumpkins remind me of Jack Skellington, the Pumpkin King, from The Nightmare Before Christmas. I'm so happy with this dress!

Halloween Print Dress


This fantastic Halloween print dress is from Store 21. It's £16 and there were two prints available, this one and a grey spider web design. They are both long-sleeved, which I really like and are made from a stretchy material. You can get them up to size 22 too, which is great! The only downside is that the material is a little fitted, and I prefer flowing, loose dresses. However, the adorable print really makes up for this.
Halloween Print Dress
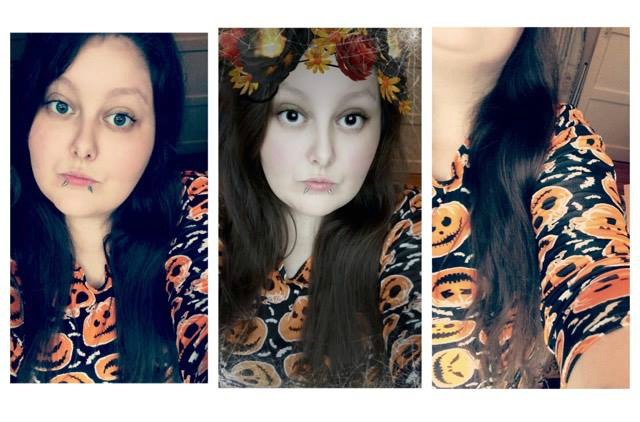
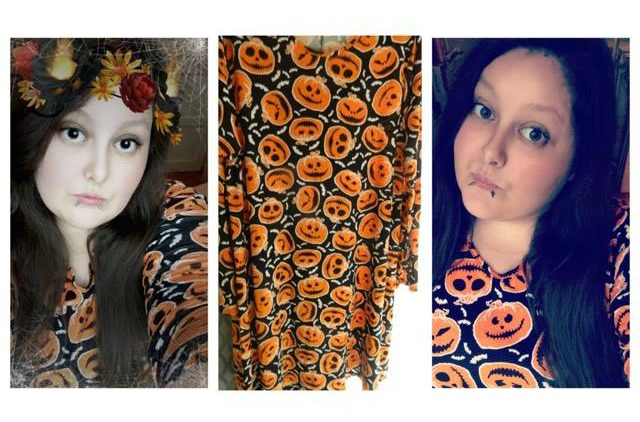
I'm lovin' the Halloween snapchat filters right now, especially the spooky flower crown one. Which is your favourite? This dress is perfect for a Halloween party, or you could wear it as your costume and try to create a pumpkin look with your make-up. I'm going to wear it on Halloween day whilst I'm wearing horror movies and eating lots of Halloween treats :) 

Thankyou for reading!


What do you think of this dress? 
Have you got a Halloween style dress? 

 Have you been following my Blogtober posts? Check out these:

 
Share:

Friday, 28 October 2016

Blogiversary Giveaway Winner | Blogtober

Hey everyone! Last month, on the 10th September, my little blog turned 1! To celebrate, I hosted a giveaway for my lovely readers to say thankyou to all of you for supporting me on my blogging journey and for being just fabulous! My giveaway ended earlier this month & it's now time to reveal the lucky winner. Good luck to all who entered :) I'll definitely be running more giveaways in the future; they are great fun and I love doing a little something to give back to you guys! 


To choose a winner at random, I entered everyone's names into a random name generator. Thankyou to the four of you who entered my Blogiversary giveaway :) *insert drumroll here* The winner of the super adorable Mermaid Pusheen figure is.... 


 ãƒ¾(@⌒▽⌒@)ノ Congratulations to Jenna! ヾ(@⌒▽⌒@)ノ

Thankyou for reading!


 I'm looking forward to another year of blogging! 

 Check out my Blogiversary post here

Here's where to find me on social media:


Share:

Thursday, 27 October 2016

Doki Doki Box Halloween Edition | Blogtober

Happy Thursday! I know I already posted about my last Doki Doki box for Blogtober Day 7, but a few days ago I got another Doki Doki box and it's Halloween themed! I couldn't wait to share it with you all :) I hope you enjoy reading! 

Halloween Doki Doki Box


Inside this box: Caplico Strawberry, Monthly Hoppe-Chan, Take-Omo: Spooky Style plushie, Kawaii Injection! Pen, Doki Doki Original Halloween Face Mask, Halloween Hoppe-Chan Stickers, Angel Wing Hair Clips, Chakkun Coin Purse & you also get a t-shirt in every box but I couldn't fit it in the photo, haha. 

Halloween Doki Doki Box

How gorgeous is this t-shirt design!? The Doki Doki team collaborated with an artist called Tokimekiwaku to bring us this awesome spooky kawaii design! I absolutely love it ♥ I really like the pastel colour scheme and the characters are awesome! I'm happy that the t-shirt is black too because it's my favourite clothing colour. I say this everytime I write a review of my Doki Doki box but I am gutted that they don't have larger sizes available. Please change this, Japan Crate! 

Halloween Doki Doki Box

 A Halloween themed box wouldn't be complete without some Halloweeny stickers, so it was great to see some in the box. I'll be using them when I send some cute seasonal cards to my penpals. The angel wing hair clips are really cute, definitely something that I would have worn when I was a teenager. I'm not sure they fit in with the Halloween theme though, but it's always handy to have fancy dress items like this around. The caplico strawberry treat was added as a special bonus item to celebrate the tradition of getting treats on Halloween, which I think is lovely. I can't wait to try it; apparently the centre of the wafer cone is filled with strawberry chocolate! 

Halloween Doki Doki Box

Here are the adorable Hoppe-Chan Halloween stickers up close! You get three mini sheets, and they are so sweet. My favourite is the one with the ghosts on. They are all so spoopy! I really like these injection/needle pens, they look really cool. I used to have a red one when I was younger and I've wanted another for years now, so I'm super happy that I got this item. I think it's my favourite thing in the entire box this month. Have you ever had/seen one of these pens before?

Halloween Doki Doki Box


Just look at that adorable cat face! Subscribers could get one of two Halloween face masks, this sweet cat one or a cute vampire fangs one. In my opinion, I got the best of the two :) I don't think I'll ever use this item though if I'm honest. The little coin purse is cute; I like the story about it in the Doki Doki magazine that comes with every box. It says 'One night, after all the shoppers and vendors had gone home for the day, the forgotten and lost accessories from the streets of Harajuku gathered together. With a bit of magic, Chakkun was born!' He's a coin purse, but the magazine suggested that it could be used for keeping your accessories safe too. I'm thinking of giving him to my niece for Halloween. 

Halloween Doki Doki Box

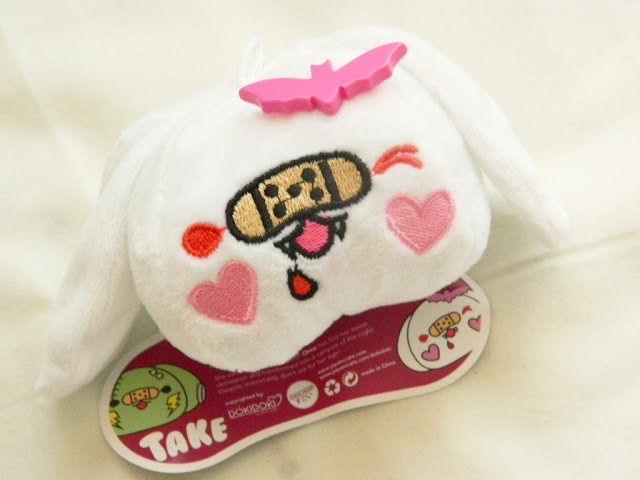
Every Doki Doki Box comes with a plushie, and this month there were two different styles available: a Frankenstein one and the vampire one that I received. It is an adorable plushie; I love his little heart cheeks and the fact that he's winking. I also the pink bat clip that he's wearing. It's super sweet! Another thing that's nice about this plushie is that it's made from really soft material, and feels like great quality. The character is called Take-Omo, and he reminds me of a baby Digimon. Who else used to watch Digimon as a kid? 

Halloween Doki Doki Box

I seriously love the charms that you get in each Doki Doki Box. It's always the lovely Hoppe-Chan (one of the Doki Doki original characters) but the theme of the charm always matches the theme of the box. I really really love the design of this month's charm! It's brilliant! It definitely came close to being my favourite item in the box. I love how brightly coloured it is and all of the Halloweeny details, especially the little Jack-O-Lantern. 

Halloween Doki Doki Box

I think it's fantastic that Doki Doki featured a Halloween themed box, as I didn't get this with my Kawaii Box subscription. I got some seriously cute spoopy, kawaii items that are perfect to celebrate Halloween. I'm looking forward to finding out what the theme for next month's box is. 

Thankyou for reading!


 What's your favourite item that I received in this box?
Who's your favourite iconic Halloween character in general? 

 Check out what I got in my previous Doki Doki Boxes: 


Share:

Wednesday, 26 October 2016

30 Autumn Blog Post Ideas | Blogtober

Hello my fabulous readers! Autumn seems to be in full swing now, and I'm absolutely loving it! Wherever I go, I see so many trees covered in autumnal leaves. There are some gorgeous trees outside of the building where I go for my psychological therapy appointments each week and everyttime I see them, I feel so happy! You know you're a blogger when everytime you see pretty autumnal leaves, you instantly think 'instagram' :) After my therapy yesterday, looking at these trees gave me the idea for today's post, haha. So, here's a list to inspire some autumn blog post ideas :) 

Autumn Blog Post Ideas

1) Your favourite Autumn candles
2) Show us your Halloween and/or Autumnal decorations
3) Cosy Night In Essentials
4) Favourite Autumn Nail Polishes
5) Autumn Outfit of the Day
6) Do some Halloween/Autumn Baking
7) Favourite Horror/Thriller/Spooky Movies (for Halloween)
8) Share your favourite homemade hot chocolate recipes
9) Your go to Autumn make up look
10) Back to school/college/university haul... Everyone loves a good stationery haul :)
11) Things to do on a rainy day
12) Your favourite places to visit this time of year
13) Carve some pumpkins ready for Halloween
14) Favourite cosy jumpers
15) Share some seasonal recipes with us
16) Top five accessories to complete any Autumn outfit
17) Your favourite Autumnal lipsticks
18) Get crafty and make something Halloween or Autumn themed
19) Favourite Instagram accounts for Autumn inspiration
20) Go for a walk in nature & take some photographs to share with us
21) Childhood memories from this time of year
22) Five seasonal drinks you must try right now
23) Try out some Halloween make up
24) Your top ten favourite things about Autumn 
25) Some people don't like Autumn. If you're not a fan, maybe share Reasons Why Autumn is the Worst Season
26) Your favourite Autumn fragrances
27) Autumn makes me think of animals :) so how about sharing a post all about your pets? (If you do, be sure to give me a link)
28) Autumn/Winter Wishlist
29) Share your Halloween costume or costume ideas
30) Favourite ____ This Month (beauty, fashion, food, etc) or Highlights of the Month. 

Thankyou for reading!


 Are you a lover or hater of Autumn? Autumn is my favourite season!

 Follow me on social media:


Share:

Tuesday, 25 October 2016

Halloween Look #4 | Blogtober

Hi guys! I decided today to experiment again with one more spooky make-up look just in time for you all to prepare for dressing up on Halloween. On Friday, I shared an A-Z of Halloween costume ideas and after including the Exorcist under the 'E' category, I was really curious about whether I'd be able to create something resembling Regan MacNeil, even if just a little, with the make-up I had. So for Blogtober Day 25, I thought I'd share my interpretation of a girl possessed by a demonic entity :) Enjoy!


 Products I used to create my Exorcist Look 

Rimmel London Match Perfection Foundation (Light Porcelian)
Rimmel London Wake Me Up Concealer (Ivory)
Manic Panic NYC Pressed White Powder ('Virgin')
Rimmel London Black Kohl Pencil Eyeliner
Rimmel London White Kohl Pencil Eyeliner
Rimmel London Glam'Eyes Eyeshadow Palette 'Brixton Brown'
Make Up Revolution Redemption Eyeshadow Palette 'Acid Brights'
• Avon Perfectly Matte Lipstick in 'Ravishing Rose'
Dose of Colors Liquid Matte Lipstick in 'Kiss of Fire' 
• Tube of Fake Blood from Poundland 

Step-by-Step of how I did my Exorcist Look

1) First, I start off by applying my usual concealer and foundation, before then adding a layer of Manic Panic's white powder to give me a ghostly/living dead look. You could probably use a white facepaint cream, which is available in pound stores nationwide right now. 
2) Next, it was time to make my eyes look a little more spooky, and dark and exhausted looking like Regan's eyes from the Exorcist movie. I decided to pull inspiration from my recent Zombie make-up look and used a dark brown eyeshadow to begin with (from my RImmel London Glam'Eyes palette). 
3) I applied the dark brown shade all around my eyes, but not covering as big as an area as I did with my Zombie look, this time I dabbed on just enough to make my eyes dark. I then added a little black eyeshadow to the inner and outer corners of my eyes, using the darkest shade of eyeshadow from my Make Up Revolution 'Acid Brights' palette.
4) The final eyeshadow I used was also from the Make Up Revolution palette and was the purple shade. I applied a little to the outer corners of my eyes, to resemble bruising. The finishing touches to my eyes was adding black kohl pencil liner to my waterline.
5) Regan from the Exorcist has a green tint to her skin so to recreate this the best I could, I lightly brushed the mossy-coloured green eyeshadow from my 'Acid Brights' palette all over my face, applying it on harder under my mouth and on my chin, as Regan also has vomit on her face in the horror movie.


6) To make my lips look crusty (lovely word, haha!) and as sore as Regan's, I applied my Manic Panic white powder to my lips, before dabbing on a little of the dark brown eyeshadow that I had used earlier for my eyes, from the Rimmel 'Brixton Brown' palette. I feel like this made them look a little bruised and blooded. 
7) Now for the most fun part, adding gore! When Regan is possessed, her face ends up covered in cuts so I decided to just draw cuts onto my face in random places that I thought looked good, the only one that I included from Regan's make-up was the stratch across her nose. I drew on a rough outline of the cuts where I wanted them using my white kohl pencil liner first, before applying a little dark brown eyeshadow over where I'd marked. This would give the cut a dried blood/under the skin bruising element. 
8) I then added a little red lipstick to the cuts to give them a sort of layered look once I applied the fake blood. I used Avon's 'Ravishing Rose' matte lipstick to fill the centre of the cuts and then added the smallest touches of my Dose of Colors liquid lipstick to the edges to look sort of like inflammed skin. You could use some red face paint for this if you wanted to :) 
9) To apply the fake blood, I always add a little 20p-sized blob into a bowl and use a cotton bud to 'paint' it onto my face. It makes it so much easier and less messy. I went over the cuts I had created, purposely going out of the lines. I gently applied the fake blood to the cuts first and after giving it a few minutes to dry a little, I applied a thicker layer on top of certain areas to make them more realistic. 
10) After finishing up my cuts, I added some random patches of blood to my face, as well as some under my lip to go with the bruised look. The final thing that I did to complete my exorcist look was to add some blood around my neck/chest using my fingers. So that's it, it was a pretty simple look to do and I think it looks perfect for Halloween night! 

So, here's possessed by a demon Sarah... (sorry the photos are dark, I did my make-up in the evening!)
Exorcist Make Up Look
I've really enjoyed having a play around with Halloween Make Up for my Blogtober posts this year, and I can't wait to create more looks next October! Have you ever created your own Halloween make up look? What did you do? If you've done a few, which was your favourite?

Thankyou for reading! 


Have you ever watched The Exorcist (1973)? What did you think of it? 

 Have you seen my other Halloween Looks? 

 
Share:

Monday, 24 October 2016

Thoughts On Being A Feminist & A Submissive | Blogtober

This summary is not available. Please click here to view the post.
Share:
Blog Design Created by pipdig